Tidal Treasure Clash
Devlog 7: Sprint Two: Electric Boogaloo
Programming
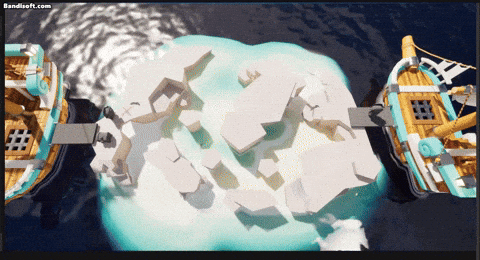
Lightning and water level bugs
Hey, Donan here again. This week I mainly focused on getting the lightning and water level to work as intended. They had a bit of bugs so I had to rework the lightning party to fix it. But with that came some new bugs so back to debugging. The water level had a problem where it wouldn’t check the players Z position correctly to see if they where drowning. This was caused by setting references to actors in the begin play. This is unpredictable as we don’t know when which actor’s begin play is going to get fired, we don’t know the order. So I put the assigning of references in the beginplay of the gamemode since that always gets fired after the actors in the scene. The bugs in the lightning event were tougher to find. The lightning didn’t spawn in the demoscene but it did in my scene. Weird. So after looking and debugging for way too long I found the mistake. The mesh point getter class got points in local space. So if the island was build around 0,0,0 it would work but if it was not it won’t. So after changing that it finally worked. Then after fixing some minor bugs it was done.
Air strafe
Lastly I messed around with the movement component settings so the player has a better feel and has air control which makes the gameplay a lot better in my opinion.
Digging Vol.2
Alex here! Continuing from last week I was hard at work trying to get the digging to work, and I am happy to report it's mostly there!
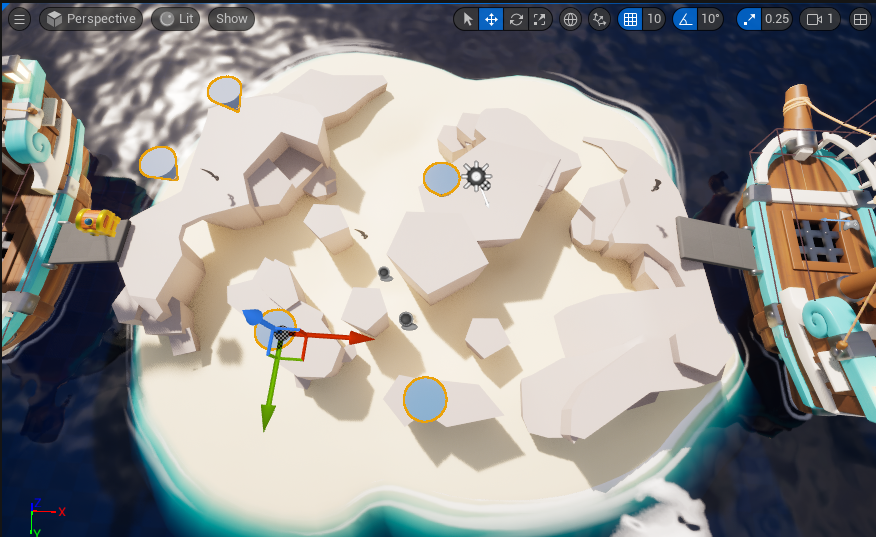
When you approach a Dig-Spot now and hold down the interaction key you perform the animation and after a fixed amount of time it will spawn a chest.
The digging spots, we originally wanted to approach them using randomness, with the same technique we used to find lightning strike spots, but we realized that there are a few spots, like the small steps, which would cause issues when a chest would spawn there. So instead we are pre-defining the spawning locations for the digging spots.
The next logical step is to make chests able to open so that's exactly what I did. After they completed their animation (which will start inside the ground eventually) you can tap the interact key to open them and they will throw out loot.
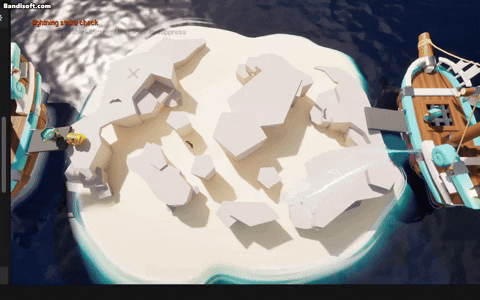
The shooting out still needs some work, I would like to have the chests throw out loot in all directions, and I need to manually disable and enable the collisions for the objects so that they don't hit the box while exiting.
I also need to work on the algorithm behind spawning. It's minor things but they will take up some time.
Camera Work
Finally, I got some feed back that my camera sucked. So I had to work on that. I changed a few values and implemented a clamp for the X and Y. The Y is very limited so that we don't move the camera too high up and the X is also clamped, but that value changes dynamically depending on the zoom. The values can still be tweaked a little but the camera feels a lot nicer especially during the chaotic gameplay.
I couldn't make a video on my own to show the difference as you can only really tell during the gameplay.
Audio
Hey, Xander here to give you a lil' something about the audio.
Since the art and dev team were so busy with the lightning event this and last week, I thought I should join in on the fun as well. So that's exactly what I did. I made the lightning strikes more impactful and added them to the game. The last stretch was a bit stressful, seeing as bug after bug kept arising. My good friends at the development team did not sit idly however and managed to make it work.
But that's not all folks, I have been cooking up the sound for the cannon as well as the digging sound. The digging is already implemented and based on what surface you're standing on.
As for the cannon, well, that will have to wait until we actually have a working one in the game. For now, you can enjoy the draft I made up in the meantime.
That's all for this week, until next time.
Art
Hey everyone, Art team here. The first week of the second sprint is over and it has been a productive week for us. This week we both started working on the textures of some of our models, so they would actually look nice, ya know? Let's dig right in!
Hi, your reading Joshua's part. I'm back with some new updates on the art side! For the first week of sprint 2 I promised that you could expect more form me, so here's what I made for this week.
Island Concept
Lets start of where we left of. Last week I showed an unfinished blockout for the island, I refined the concept with the planned assets so there isn't anymore delay on the level creation. Here's the finished island concept.
The island is based on a shark and a whale shark just to add some variation. When applying assets to your final concept its good to think to about not obstructing the players view. It's also helpful to add some volume in you concept, that makes it a bit easier to understand how the level is structured for other artists.
Trim Textures
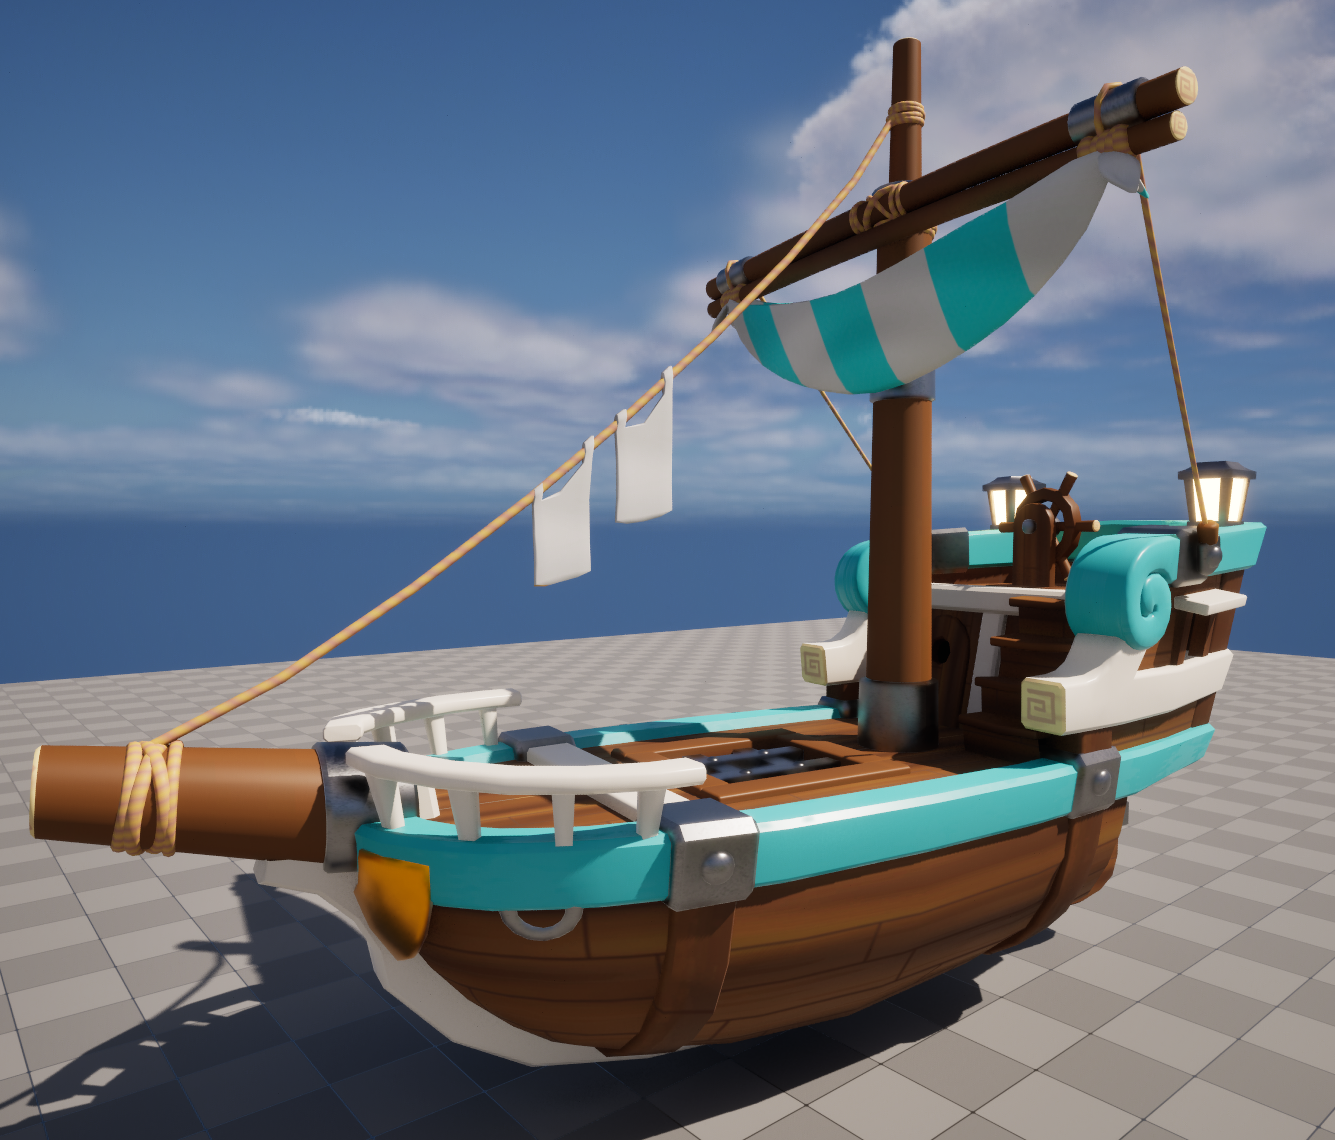
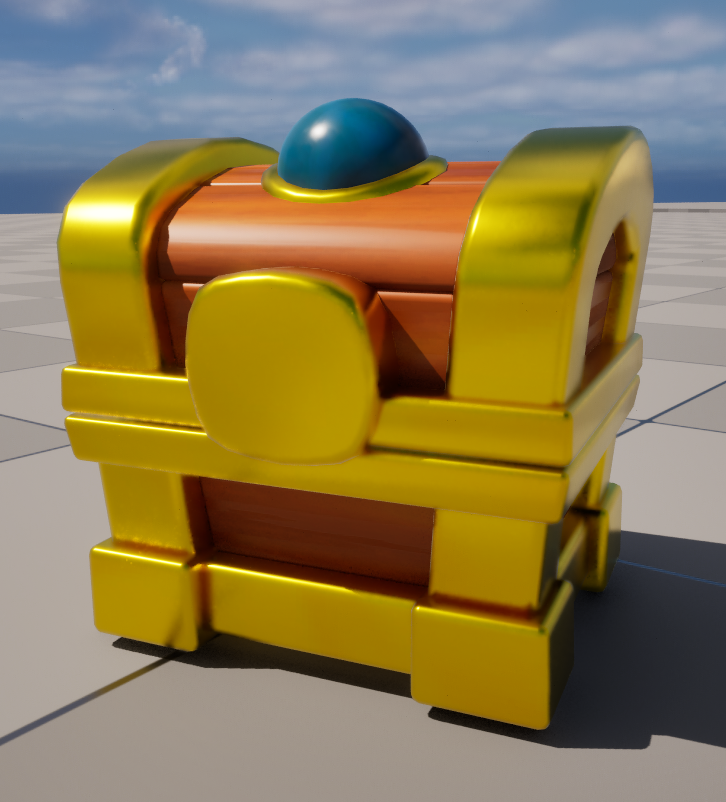
This sprint I'm finally able to work on the textures for the all the props and the character. All props require a trim texture, a trim texture is atlas of materials where the UV's from a model can be put into those specific material sections. Were using trim textures since its reusable and it keeps the style consistent throughout all the assets. We decided to make 3 trim textures 1 for the weapons and props, 1 for the treasure chest and treasure and 1 for the ship.
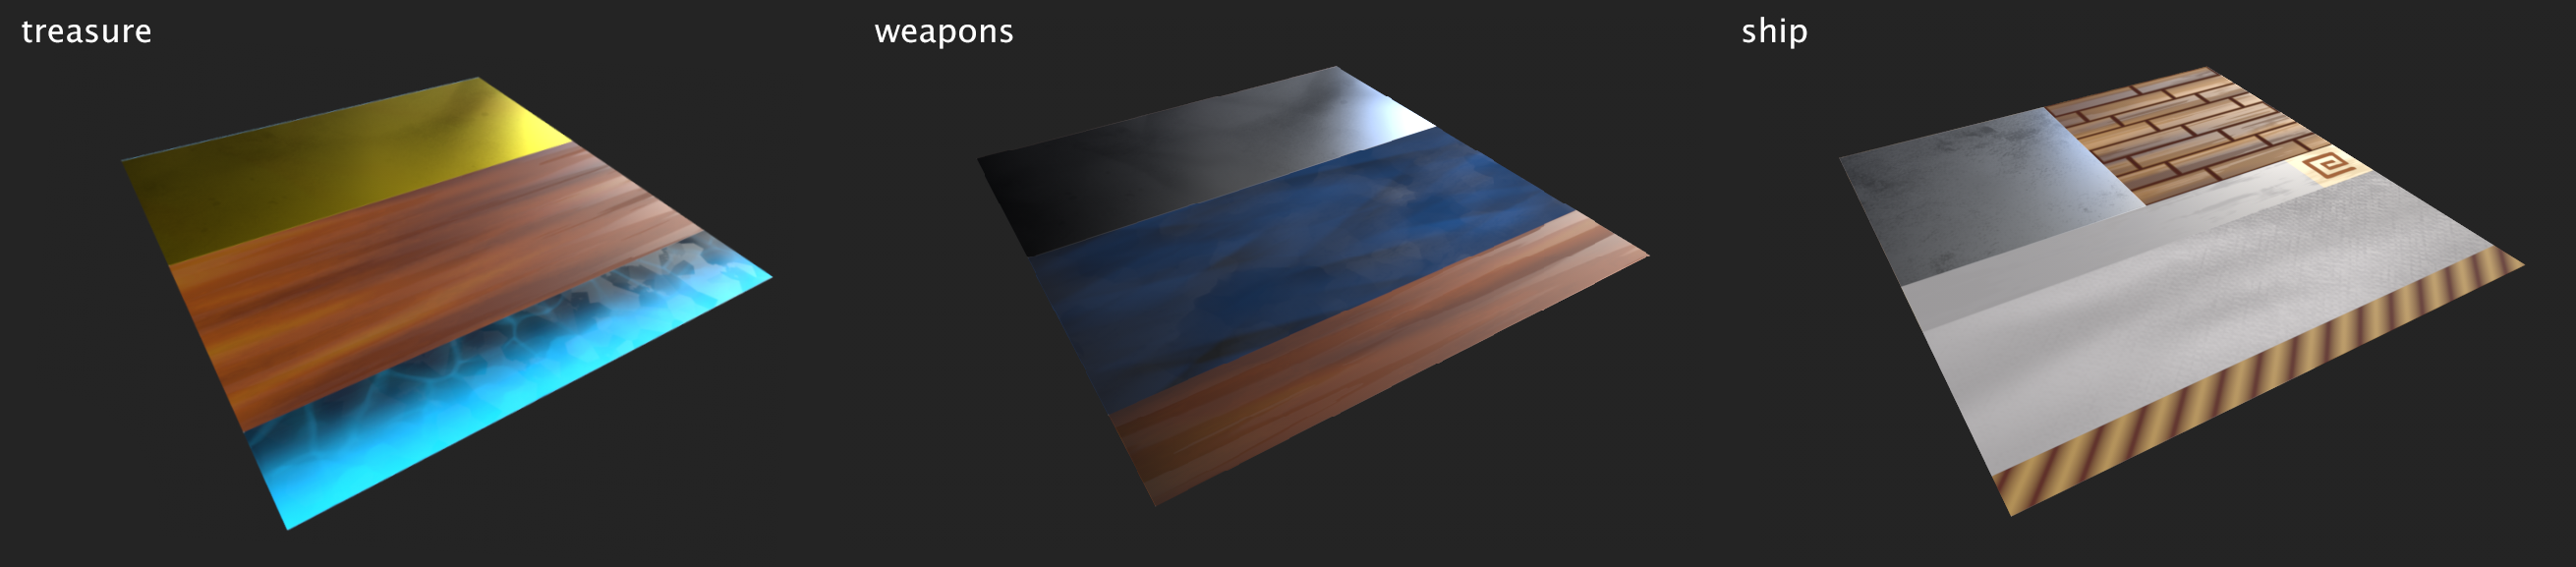
The ship was a special case since it changes color on specific areas depending on the team color. To change the color for the team, the shader needs a mask to mask out the parts where the team color gets applied.
All the other trim textures were pretty much straight forward. The only thing that took a while to figure out was the crystal trim for the treasure trim texture. I ended up using a Voronoi pattern that only makes the outlines of the cells visible, there after I distorted it so it doesn't look to even. This kind of gave the effect for edge highlights or cracks in a gem.
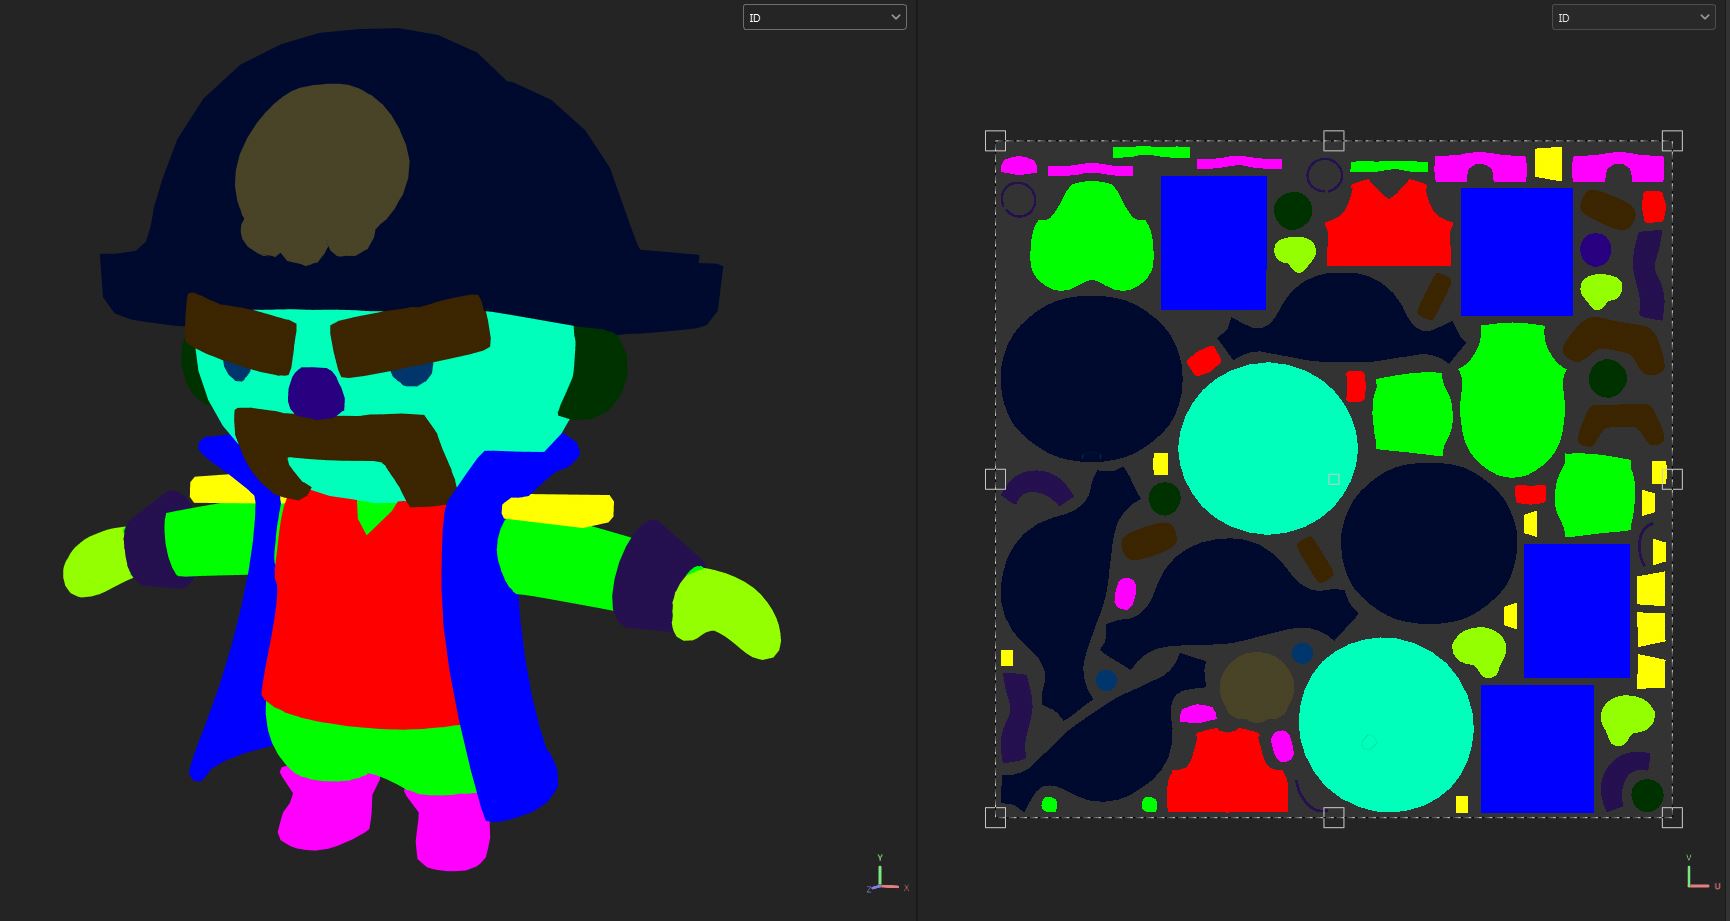
Character Texture
For the character, the first thing to do was to make an ID map. An ID map is useful to apply colors in Substance Painter. To make an ID map I have to go into Maya and assign materials with different colors to the parts that i want to color. After that I export the colored mesh in put it into substance to bake it on the mesh I want to texture
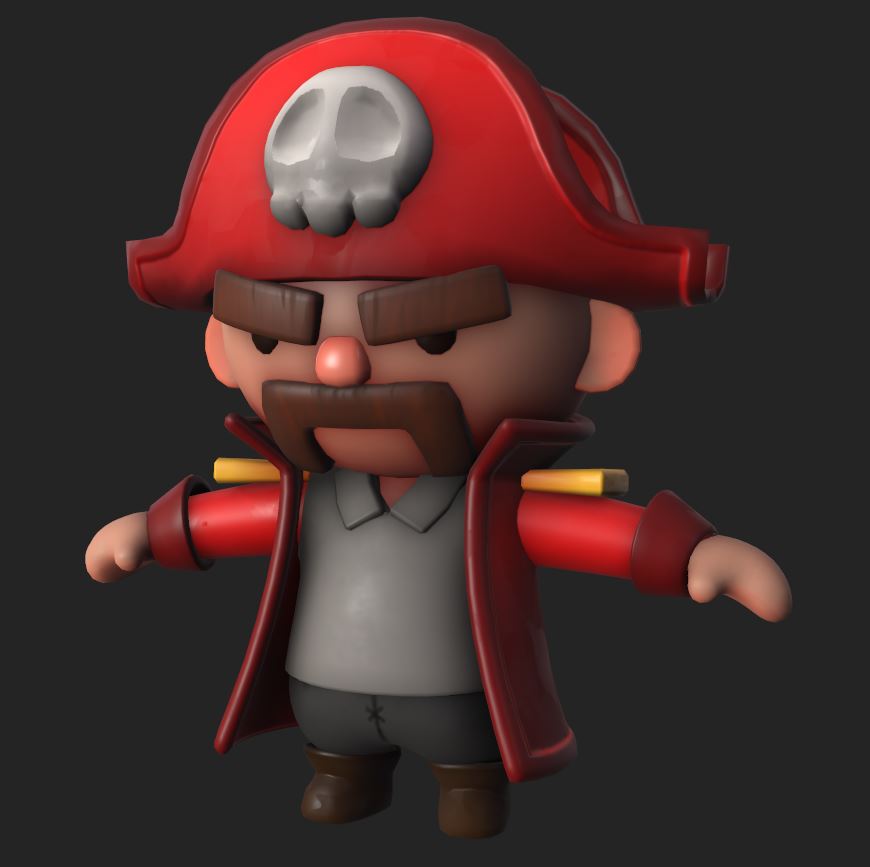
After the bake I can start working on the textures of the character. I started out setting up the base colors for different parts of the character followed by the other maps like roughness, metal, normal,... Finally I masked out the the parts where the team color gets applied. Here's the textured character, I also made an other variation.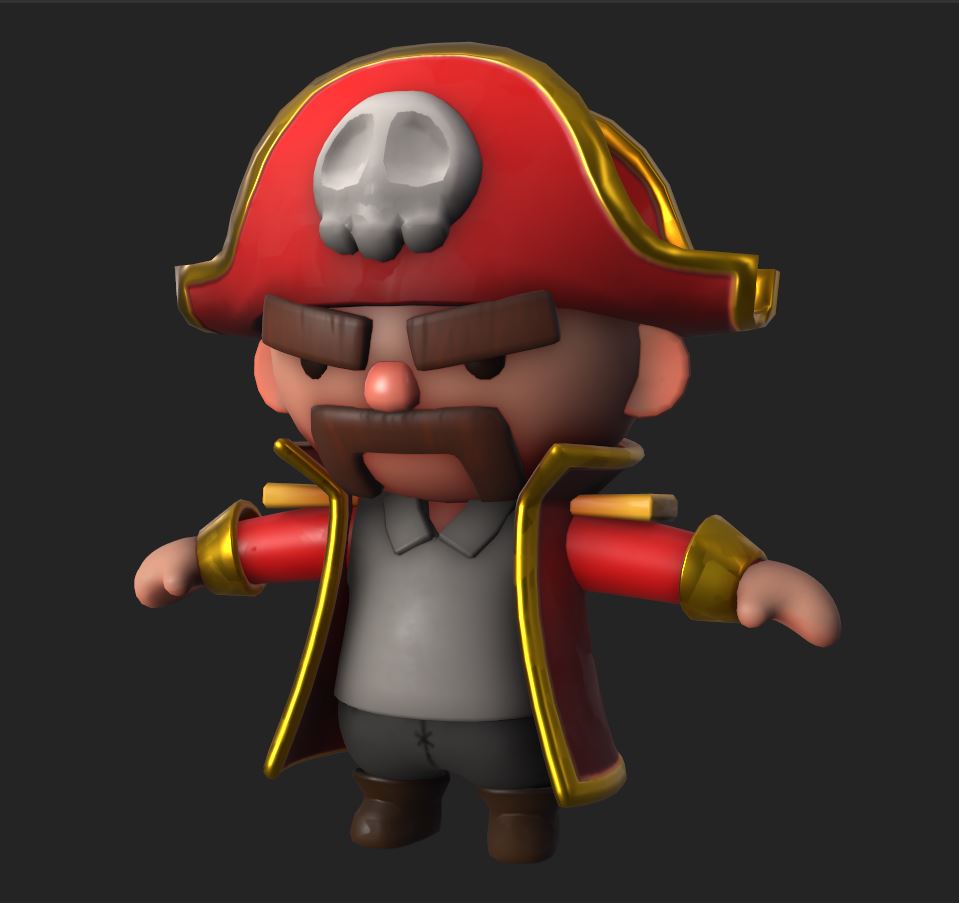
X Marks The Spot
Finally, I worked on the X decal that marks the spot where the treasure gets dug up. I'll quickly go over the material since its fairly simple. I started out making mask in the shape of the X with a stroke that is put in a different channel.

After making the mask I started making the decal material. A decal is basically a texture that gets projected onto a object. The material makes sure that the x glows in and out with a panning texture to make it slightly more interesting. Here's the final result.|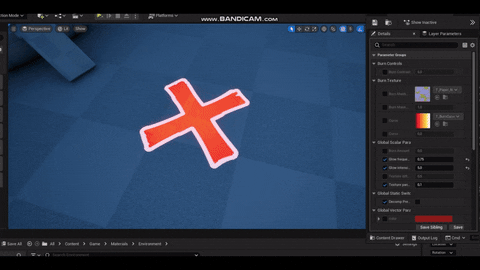
With Jay's decomposition shader for the fade in and fade out the end result looks pretty neat. That's all I have done for this week. Next week you'll see more RFX from me. Now back to Jay
Hey again, again. Jay here. As stated above I worked helping our objects get textured. While Joshua was responsible for the actual texturing part, I helped with applying those textures on our model by creating UV's and creating materials for all of our different assets inside of Unreal.
For the assets we textured this week we dicided to make use of trimsheets, which is basically a collections of different materials packed inside of one single texture. We did this because our bigger assets had a lot of repeating patterns such as wooden planks. I won't go into details about the UV's as it's pretty boring so instead I'll leave you with a few screenshot of the assets that are currently done and implemented!
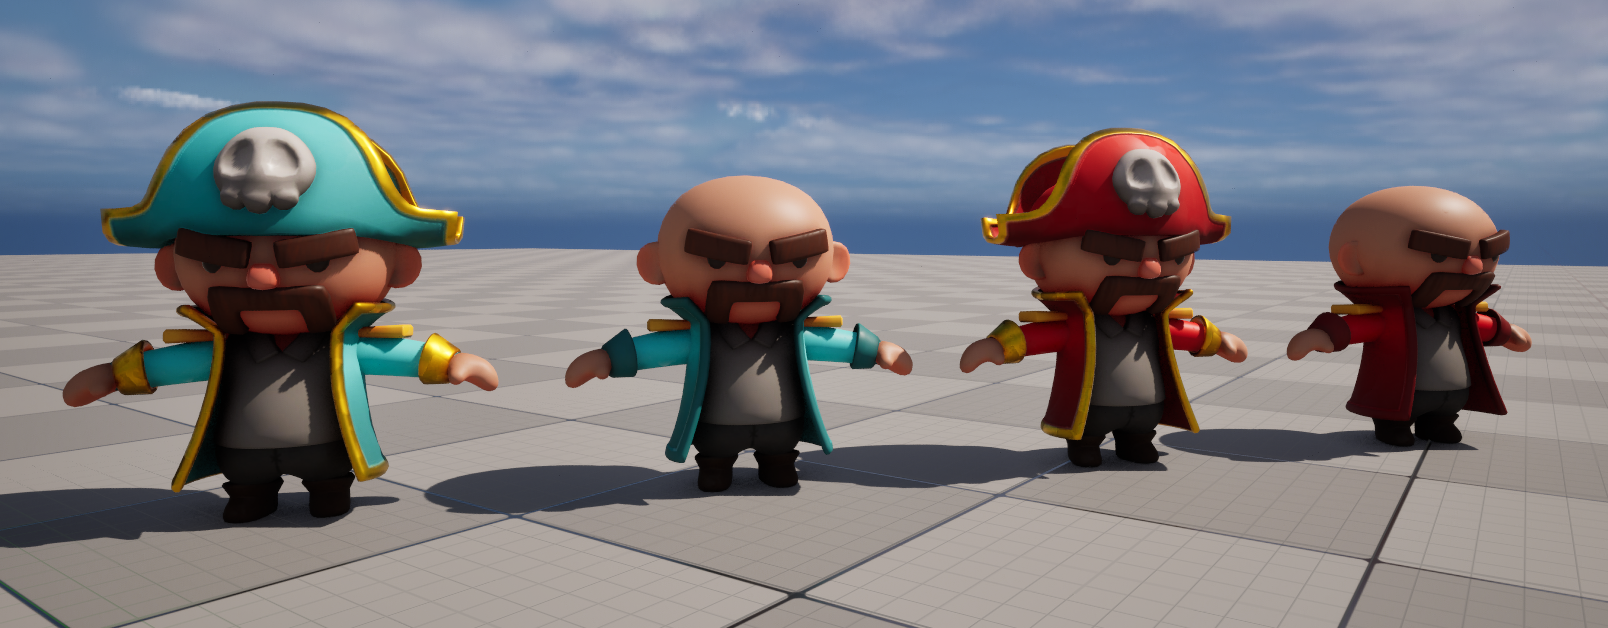
As you can see, we now also have a second playable character! The process of making him was pretty simple, I just had to take our first character and remove his hat and re-bind his skeleton to his body. The whole process took about an hour so that was a nice change of pace!
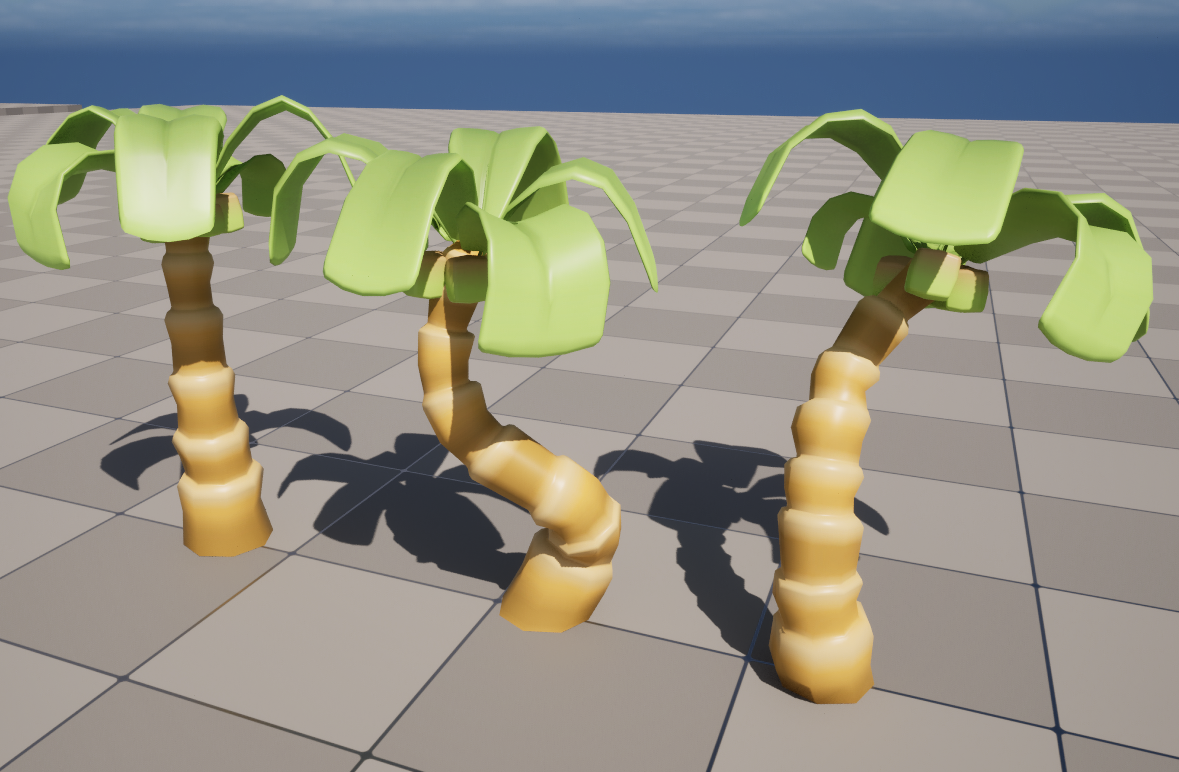
I also worked on some models and textures myself. Last week I already started making palm trees for our island but didn't manage to complete them, so I worked on finished those this week! Luckily for me Joshua had already made a really nice looking tree mesh during the prototyping phase so all I had to do was make a few touch-ups here and there before I could start texturing it. I also made two more trees in a similar style myself. Once the models and its uvs were completed I took them into Substance Painter and gave them some textures. Here's the final result in engine:
That was all from me for this week. Hope you enjoyed this quick little overview!
Thank you all for checking back in with us this week. We hope you enjoyed reading about this weeks progress. We're very happy with the direction in which things are going even while there's certainly still a lot to be done, but hey, that's gamedev for ya!
Once again, thanks for reading. We hope to see you all again next week, have a good one!
Leave a comment
Log in with itch.io to leave a comment.