Tidal Treasure Clash
Devlog 4: Start of production!
Production phase!
This week we started production phase, no more prototyping, we start with a fresh unreal project. Now we only need to make some new code and some new assets!
Programming
Weapons/Animations & Object Pick-ups
Donan here! This week I started with making the base weapon class. This was an easy first task as the weapon class doesn’t need a lot. I added a single StaticMesh component and made sure it got all the right settings when it gets constructed. These settings make sure the weapon is a physics object so it can be interacted with in the game.
After finishing the base weapon I moved on to make the pickup and drop system. I went with a similar approach as the prototype where I use a sphere trace to check for nearby items. The player uses the interact key to do the sphere trace. When the sphere trace hits an item that can be picked up I store the hit object in a pointer so we can easily access it later. Then I change the hit object’s physics and collision settings so that it doesn’t interact with the player. This also causes it to not interact with other physics objects anymore. After that I attach the hit actor to a socket in the hand of the player. The player is now carrying the object! When the player presses the interact button again he drops any held object. I make sure to set the physics settings back to what they were and I detach the object from the socket.
As a third task I set up the physical animation component. I added the component and proceeded to call the necessary function for all its settings. First I call the function to set the skeletal mesh component. This passes the skeletal mesh to the physical animation component. Then I had to set simulate physics to true for every body in the physics asset except the hips. To skip the hips I simply started the for loop with index 1 since the hips are the root and thus index 0. After the loop finishes I need to apply the physical animation settings to all the bodies. Luckily there is an existing function that does exactly that. After calling this function the physics animation component is set up.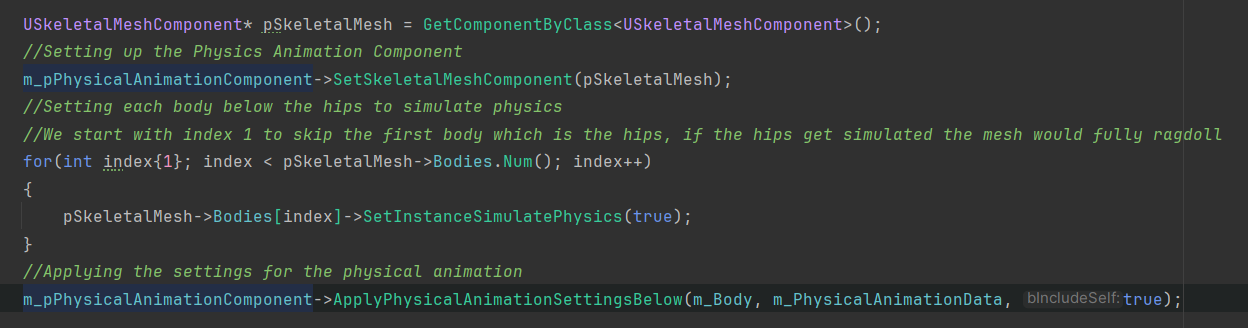
Now we have to go to the player blueprint and set the default values of the physical animation settings to our preferred values and test it. When testing at first I noticed that it didn’t feel right and that somewhere some settings had to be tweaked. So I looked around and found that the physics asset of the character can use some tweaking. The constrains in particular determine a lot about how the character can move its limbs.
As a last task I started working on the attack functionality but that will take some more time. You can read about it when it’s finished in the next devlog! Now for Alex's updates.
Input/Movement/Animation
As for my part, this week I mainly focused on brining over what we had setup from the previous prototype project into this one and converting it to C++. Afterall, we had already made it so it should be easy.... why do I always do this to myself?
Having never worked with the new enhanced input system in UE in C++ it took me a while to get used to it. But I got there in the end. I made our character move according to the world direction and not his own as opposed to the UE5 mannequin because we had some issues with the player becoming disoriented when colliding with certain objects and we assume it was this that caused the issue.
When combining Donan's and I's work you get this:
Foundations for the future
After that, I started to work on one of the very important parts of our game, the random events. We want to start with the lightning storm event, as it seems like the easiest to implement and get our event manager up and running. What lightning storm? We'll I'm glad you (probably) asked! It's going to be a simple event where lightning starts reigning down from the sky. It's the reason why Joshua worked on that storm effect in the prior weeks.
We want to approach this in a way so that we can avoid shooting lightning in the parts where the water has already covered them. To do that we want to get the points of the ground mesh, and then thin them out, based on a number of factors such as their normals (usually the ones pointing towards the positive Z will be kept), as well as their Z value (they have to be above the water+ a little leeway) and more. Wether this would work was an uncertainty so I wanted to tackle it right away and so I did.
I managed to get the points of any given mesh, and just randomly select a given number of them. This is all done in C++ of course, but in a not so permanent way, I just wanted to get the feel for how we will approach this in the coming weeks.
You might also notice that we are using ImGui. This was a choice by the programmers so as to provide easier debugging tools. We have an ImGui general manager which you can call from anywhere and attach various functions and variables to it. It's very bare bones but we don't want to spend more time on it than we need to so we only add to it whenever we need something. It's quite easy to add/remove portions of it such as the buttons and numeric fields I added this week.
That's all folks!
Audio
As for the audio, I haven't been idle either. I started the week off by developing multiple variations of the characters' footsteps. I then moved on (and took way too long) on making an ambience with multiple shifting layers, anything from your default wind to parrots in trees. The implementation of the ambience was no joke either, between metasounds annoying me and C++ being a pain in the rear, I finally managed to make an actor component that works and is reusable for other sounds. I finished this week by starting on the punches the characters will be hitting each other with. It is still a work in progress but it's coming along nicely. That's all I for now.
Your favourite sound guy,
Xander.
Art
Environment
Hey everyone, Jay here! This week we finally entered production, exciting times are ahead of us. Last week I talked a little bit about rigging and animation and I showed you the initial model of that character that Joshua made. This week I will showing you some of the environmental art that is being made. Let's get into it!
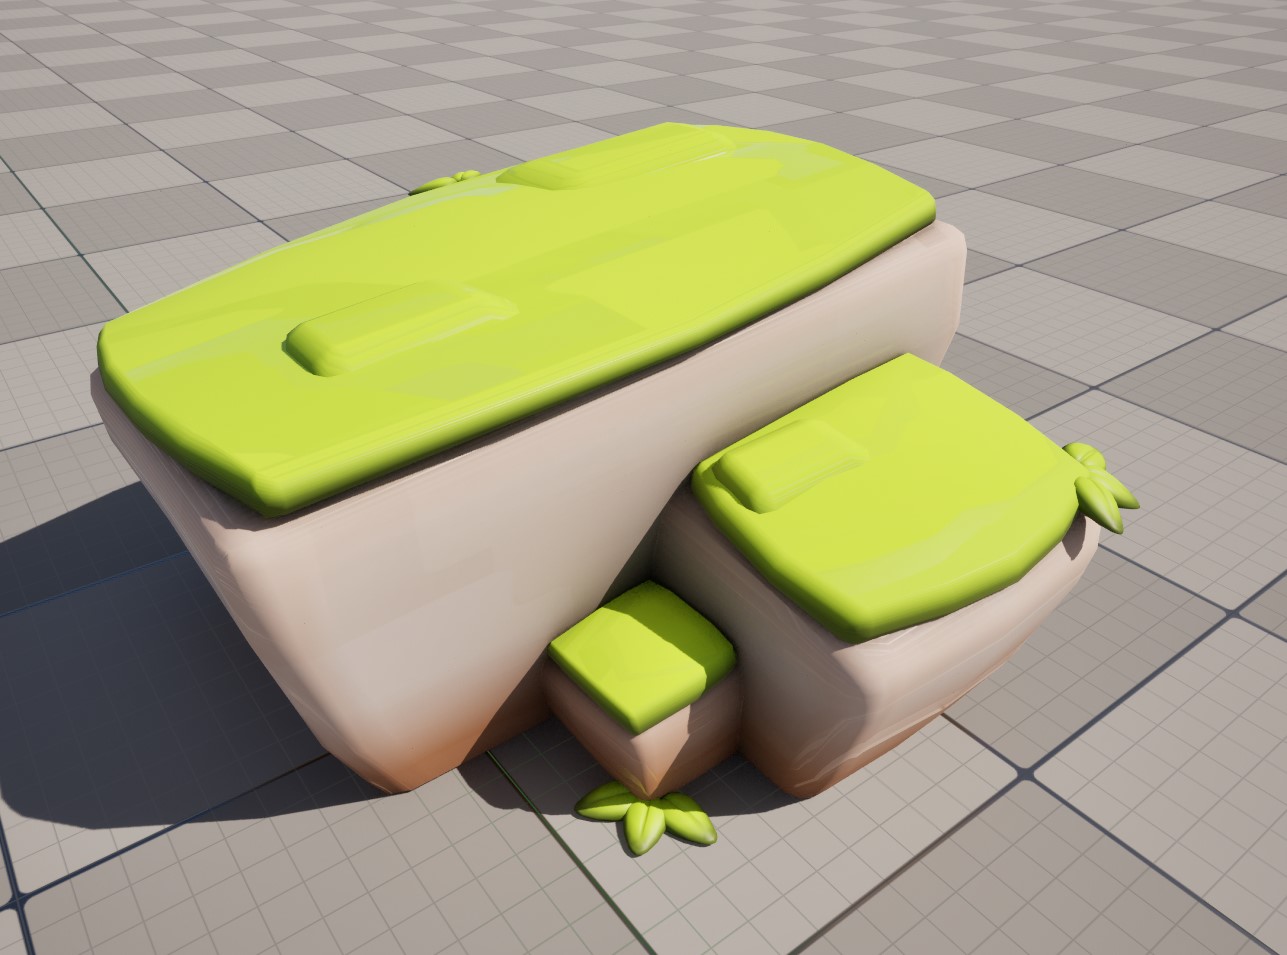
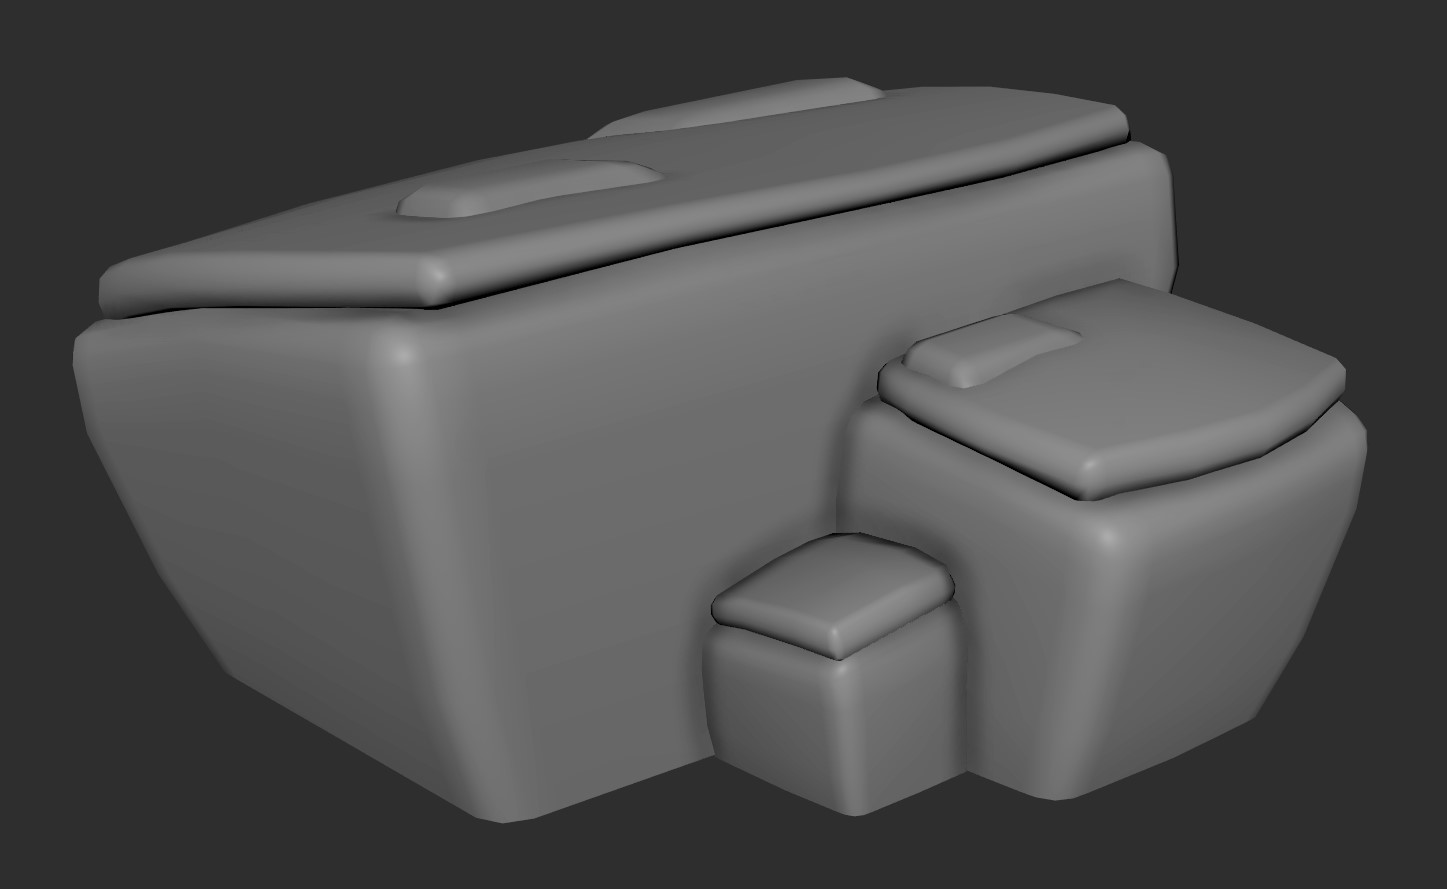
The image above shows you one of the bigger rock formations that I made for the level/environment. This piece can be used for set dressing or for gameplay purposes. I made a set of three of these rock formations, one large, one medium and a smal one. These sizes should be enough to roughly create a level, which is what us artists will be taking a look at next week.
The first model took quite a bit of time because I had to re-familiarize myself with the workflow and its quirks, but once I got the first model down the other two were done relatively quickly. I'll break down into a few simple steps the rough workflow to make a piece such as this.
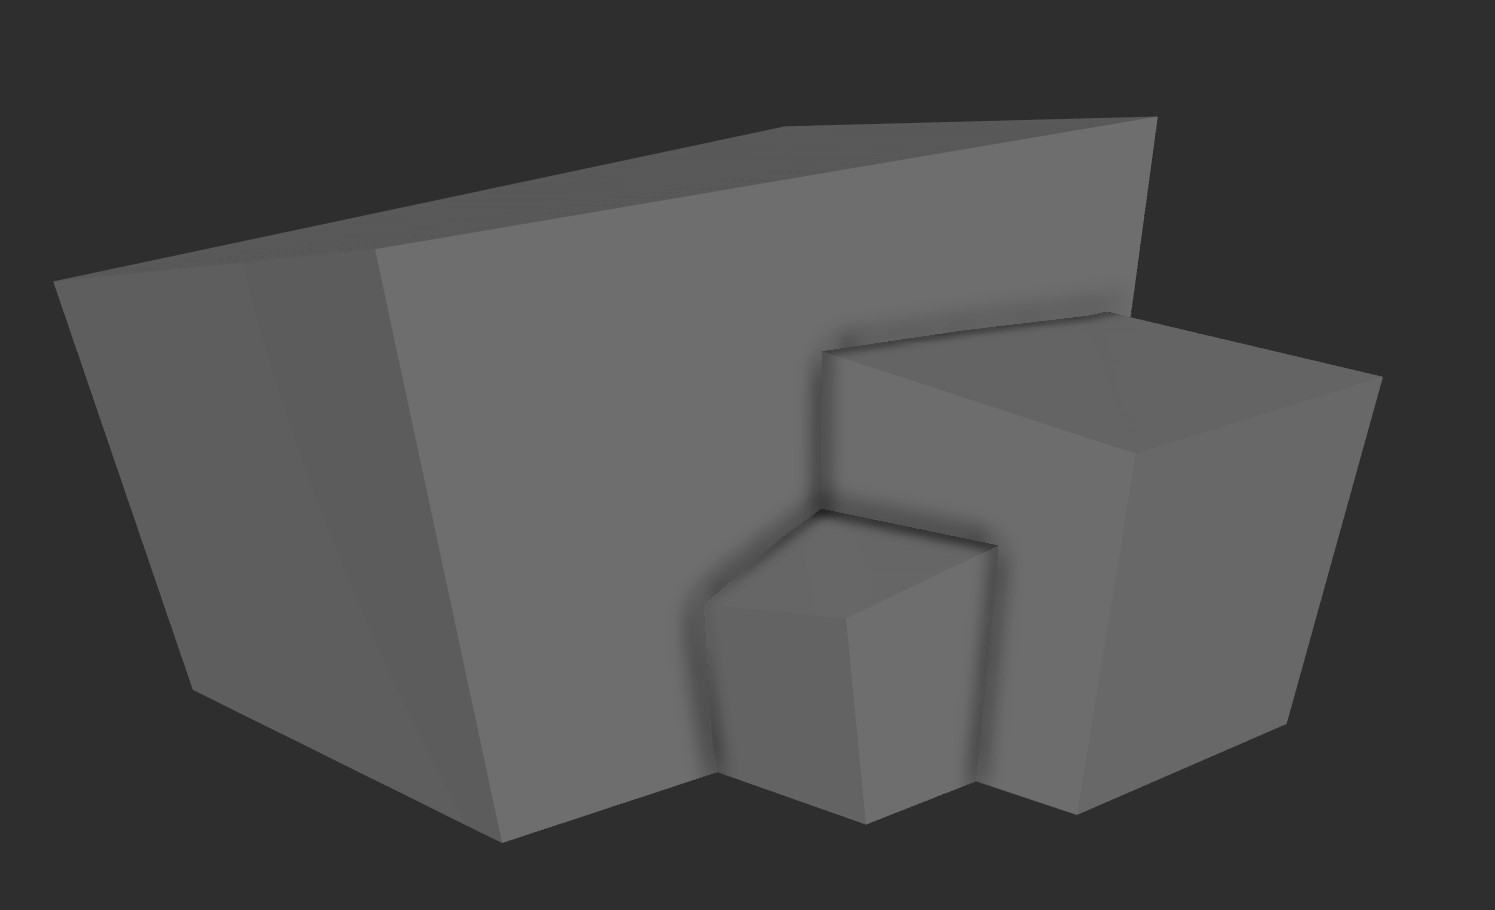
1. Blockout
In this phase I use basic cubes to create a shape/composition that looks nice, it's very important not to get lost in the details in this phase because what were looking for is a good silhouette, not the fine details. I then take this to Joshua and ask for feedback. After said feedback has been given I apply it, check again with him and if all is well I move onto the next phase.
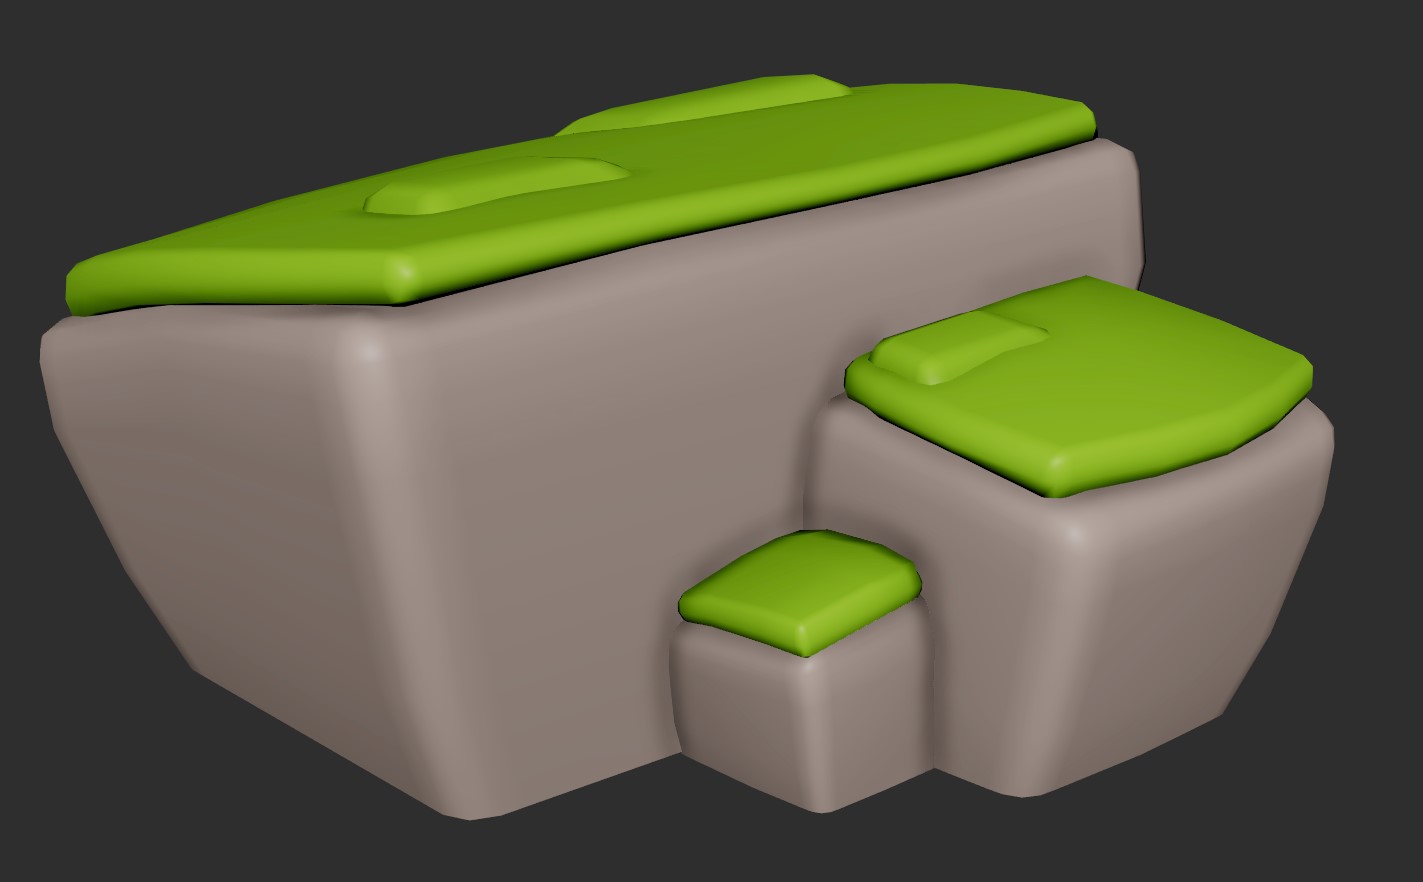
2. Refinememnt
The refinement phase is where I can focus on the details and make sure model looks nice. I first take the blockout and give it some more volume to get rid of the "straight" look. I do this by adding some loop cuts and scaling all the interior points outwards, essentially blowing up the model. It's important to not overdo it as that can remove the tapering look I gave it during the blockout. I then make a copy of this model and then I move on. Then I extrude the top faces for the grass layer, give it some thickness, and then add a nice bevel to all the edges. I also add the last smaller details like grass patches during this phase.
3. Implementation
Before I can implement it into the engine I have to assign materials to the grass and rock parts, this already gives me a quick preview in Maya of what the model will look like. Then I give it two UV sets and some proper UVs so it can work nicely with the shader in engine.
Remember the duplicate that I made of the model? Well I will use that as a collision mesh and export it alongside the model itself. Using this model ensures that the collisions will be accurate as it closely resembles the final mesh. After that I can finally import it into the engine and assign the proper material to it.
Do this entire process three times over and guess what? You've got some nice rock meshes for the game! Now all that is left to do is to detail it with some grass for example.
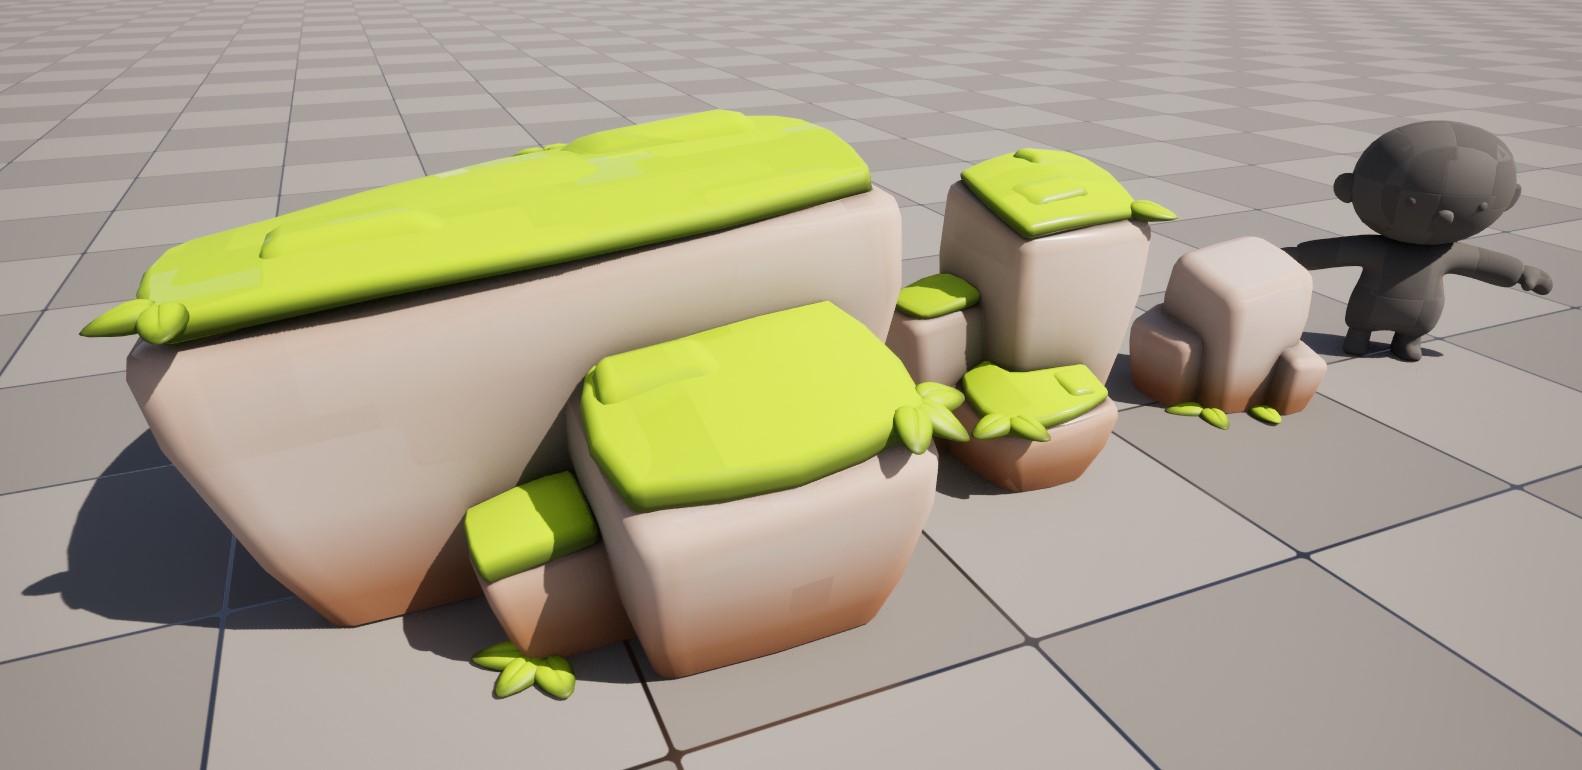
And that concludes the process! As you can see it's a rather quick progess and because our shapes are rather cube like, we can work very quickly and iterate very fast.
I hope you enjoyed this breakdown. Next devlog I will be back and I'll be showing you some of the level for our project. Stay safe out there, see you next time!
Hi I'm Joshua, I like drawing, I'm responsible for most of the concepts. This week I made the concept art for the boat and the sword. Not many concepting pages since we only have ample amount of time sadly. No worries though, more art coming soon, I swear, please.
Sword
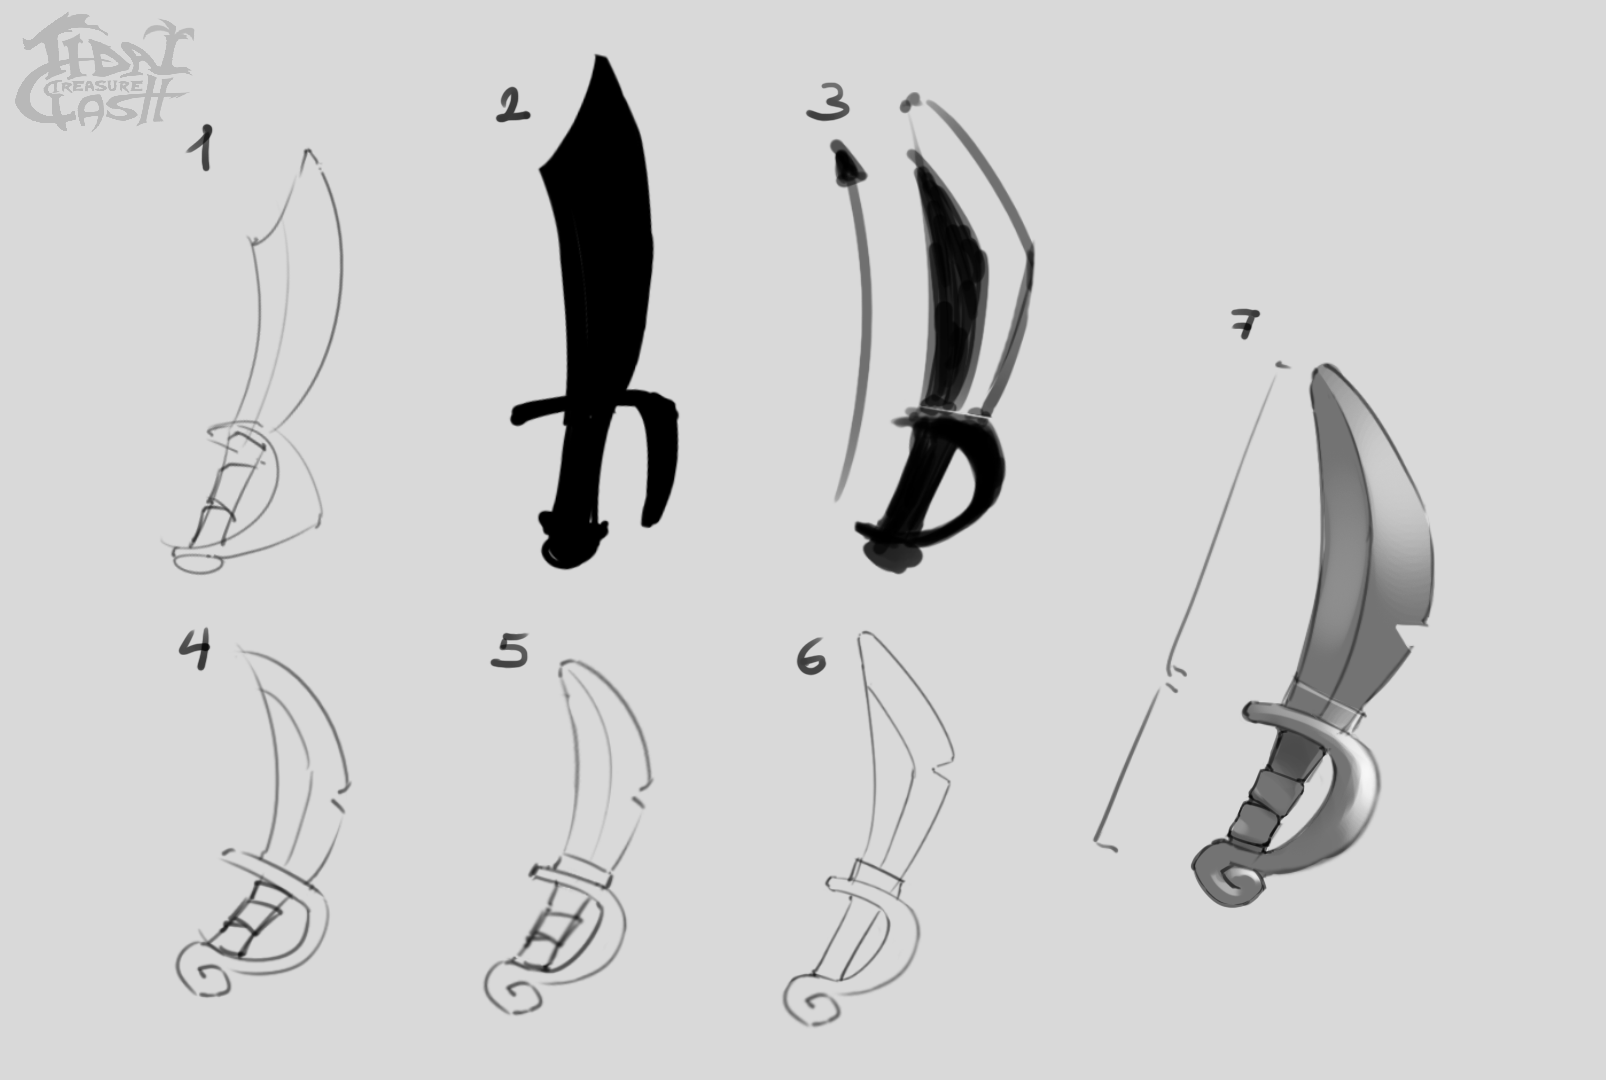
The sword is one of the weapons that can be used to fight of your opponents. It has a slicing type of attack to knock your enemy's out. Pretty straight forward weapon, later well be introducing some other types of combative items like the spear and the shield.
My main inspiration for the sword and boat leans more towards a small cutesy style with bulky features. And of course it is also important to use real life references.
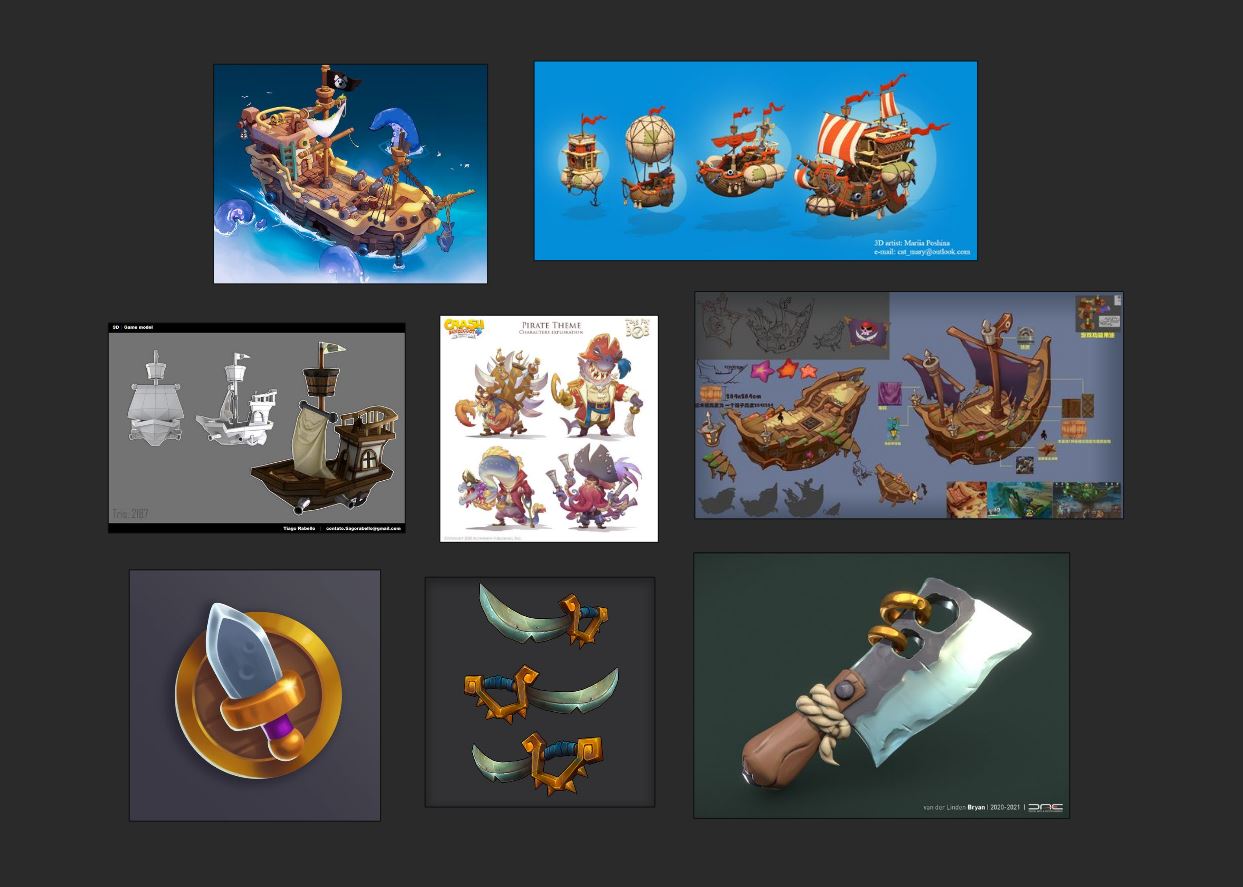
I also applied the rounded shape language that I noted in the art bible. The only things that are important to me is that the weapon didn't look to similar to a banana (see concept nr.5) and that the blade was the major focal point of the asset
here's the concept page for the sword.
Ship
The ship is one of the main components to the gameplay. On the ship you'll be able to put your treasure and other loot. its especially important to be able to collect a lot of loot to declare your pirate crew the King of.. you know. There's also a canon to blast away your opponents or shoot yourself closer to your opponents.
I took a similar approach for the ship style wise, looking at a lot of smaller type ships that are more exaggerated. The important parts for the ship is that the player needs enough space to access the cannon balls and the canon itself. Also, the boat cant be ginormous so it doesn't become bigger than the map. I first started out making 50% accessible as a playable area, but I still found that the playable area was to cramp especially when you put a cannon on the boat.
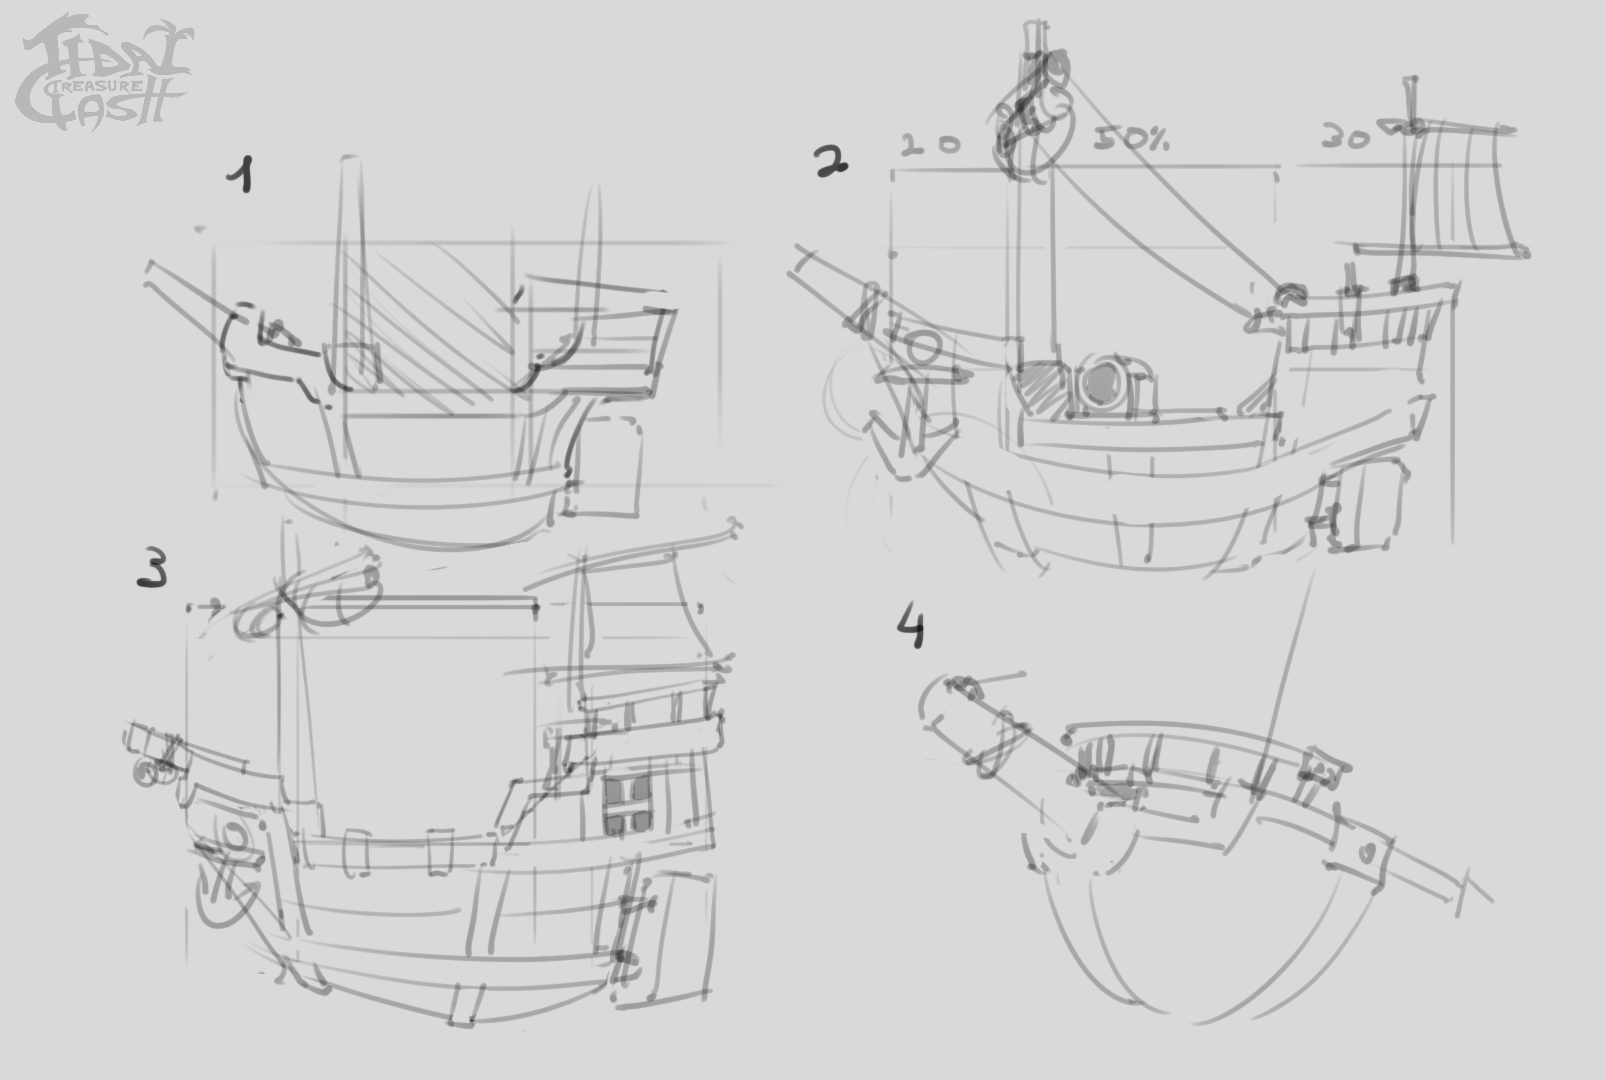
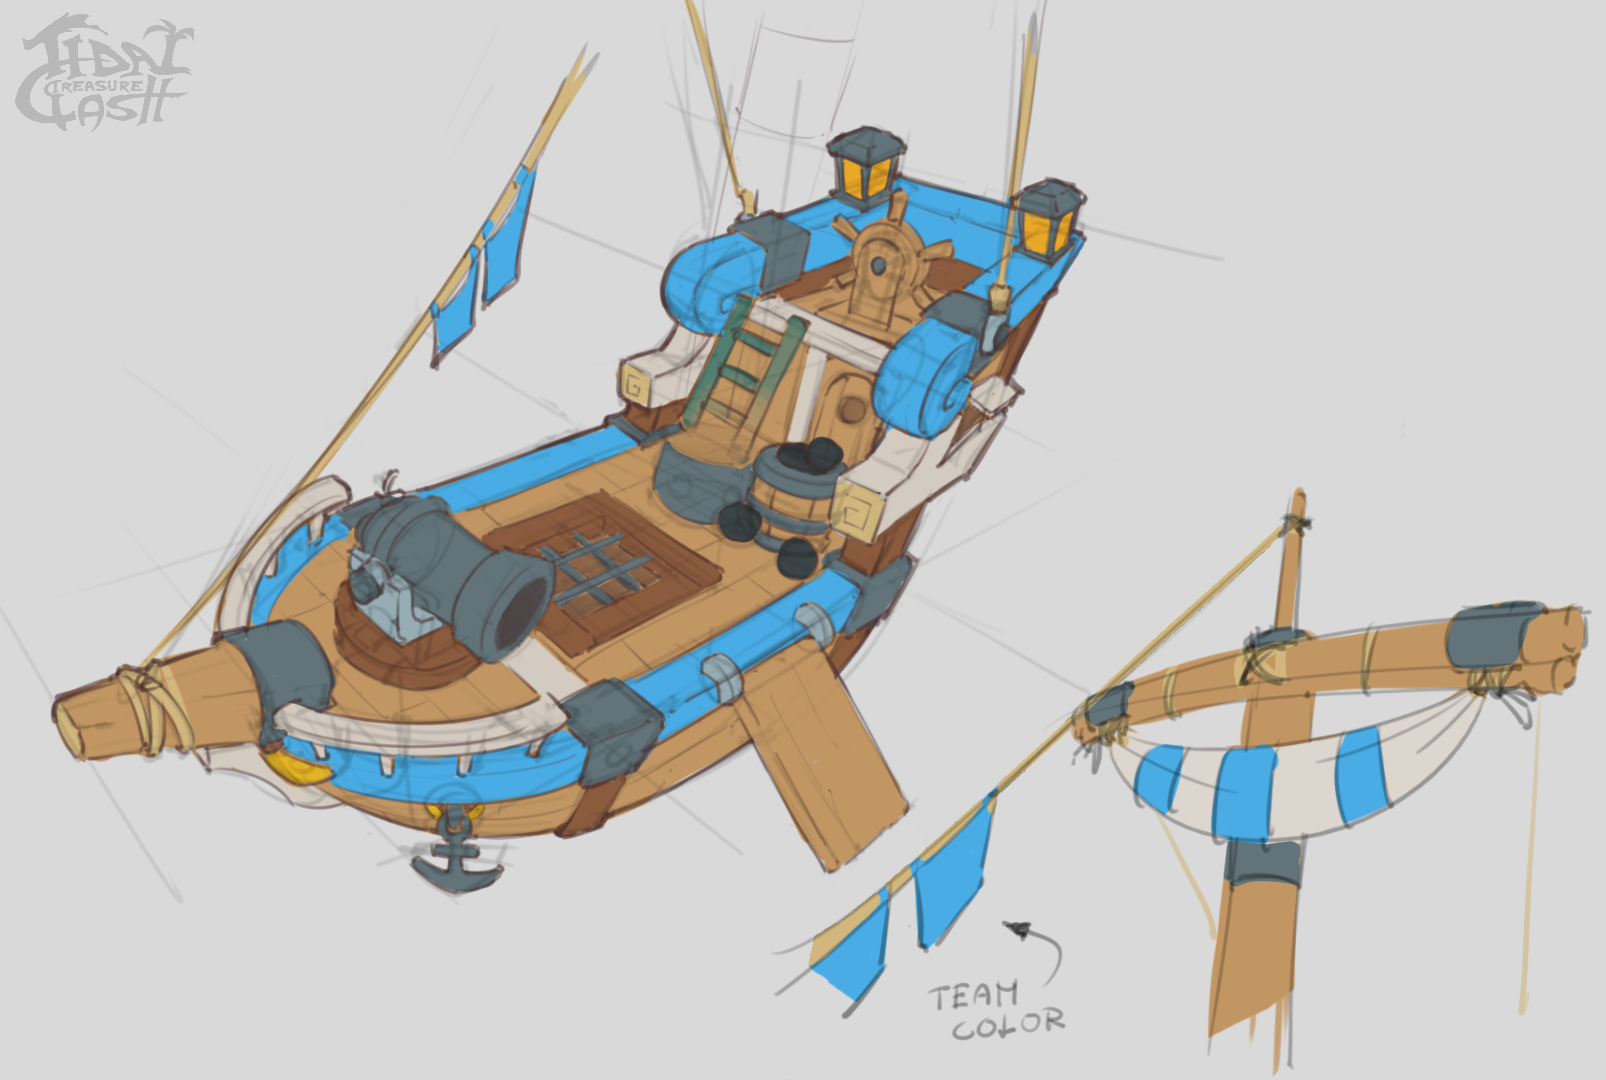
I started looking for references of ship variants which I then combined into a concept that I eventually went further with into the next stage of concepting. After that I shared my concept with my team members to ask for feedback, the main takeaway from the feedback I got is where the cannon should be on the ship

There was also a discussion on where the team colors will be indicated on the ship. My fellow artist and I ended up deciding to put the team color on the rim of the ship.
Here's the final concept for the ship.
Blockout
After the concepting stage I started working on the blockout of the ship in Maya. The blockout phase is were I make a rough shape of the ship. This helps me get the right proportions and feel before adding to much details. If I were to add too many details it would be harder to make big changes. The next phase is to add details and add better shape definition, but that's for next week.
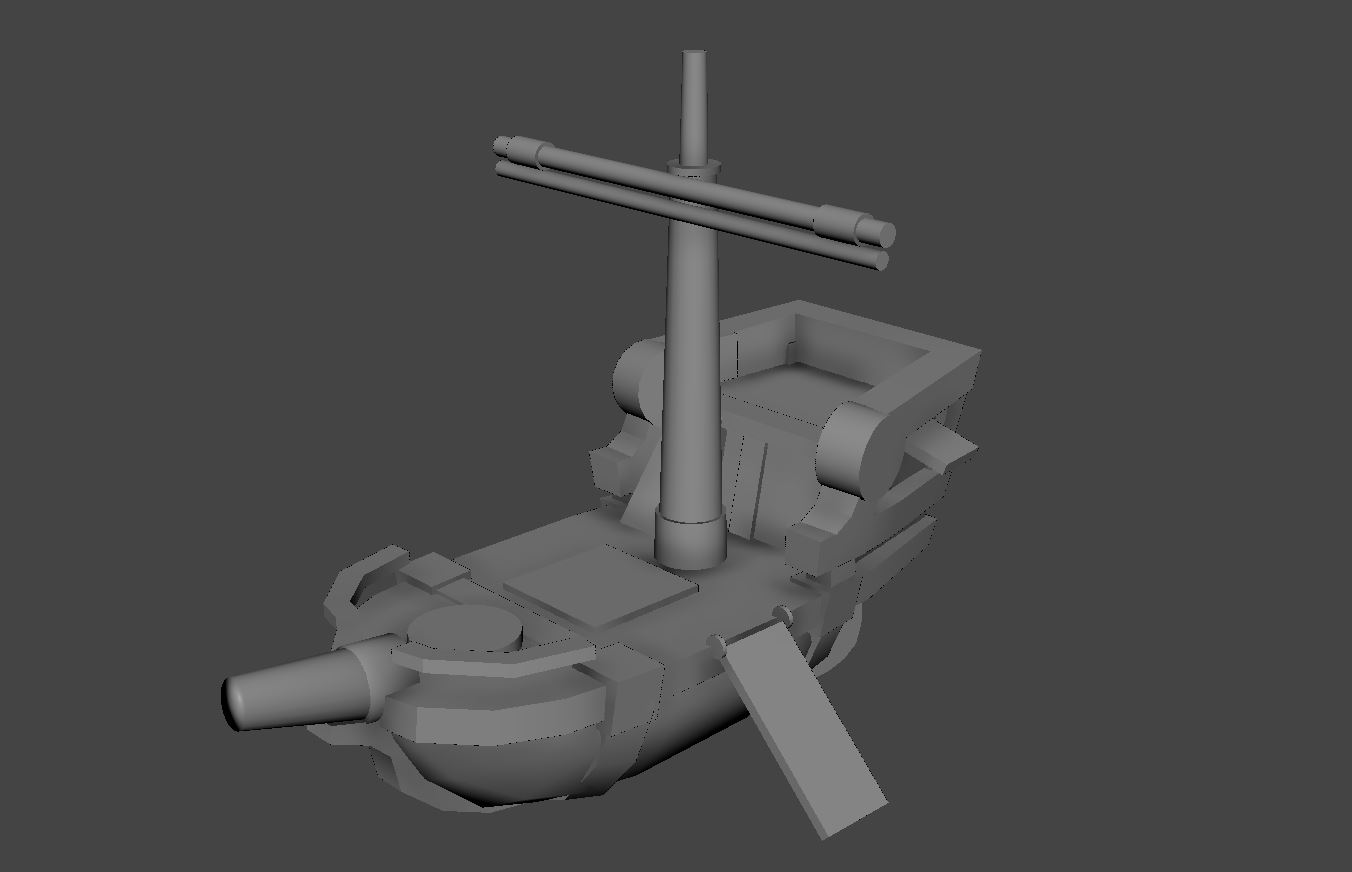
That's all I did this week thanks for reading, FULL BOAT MODEL PREVIEW RELEASE NEXT WEEK, STAY TUNED
Leave a comment
Log in with itch.io to leave a comment.